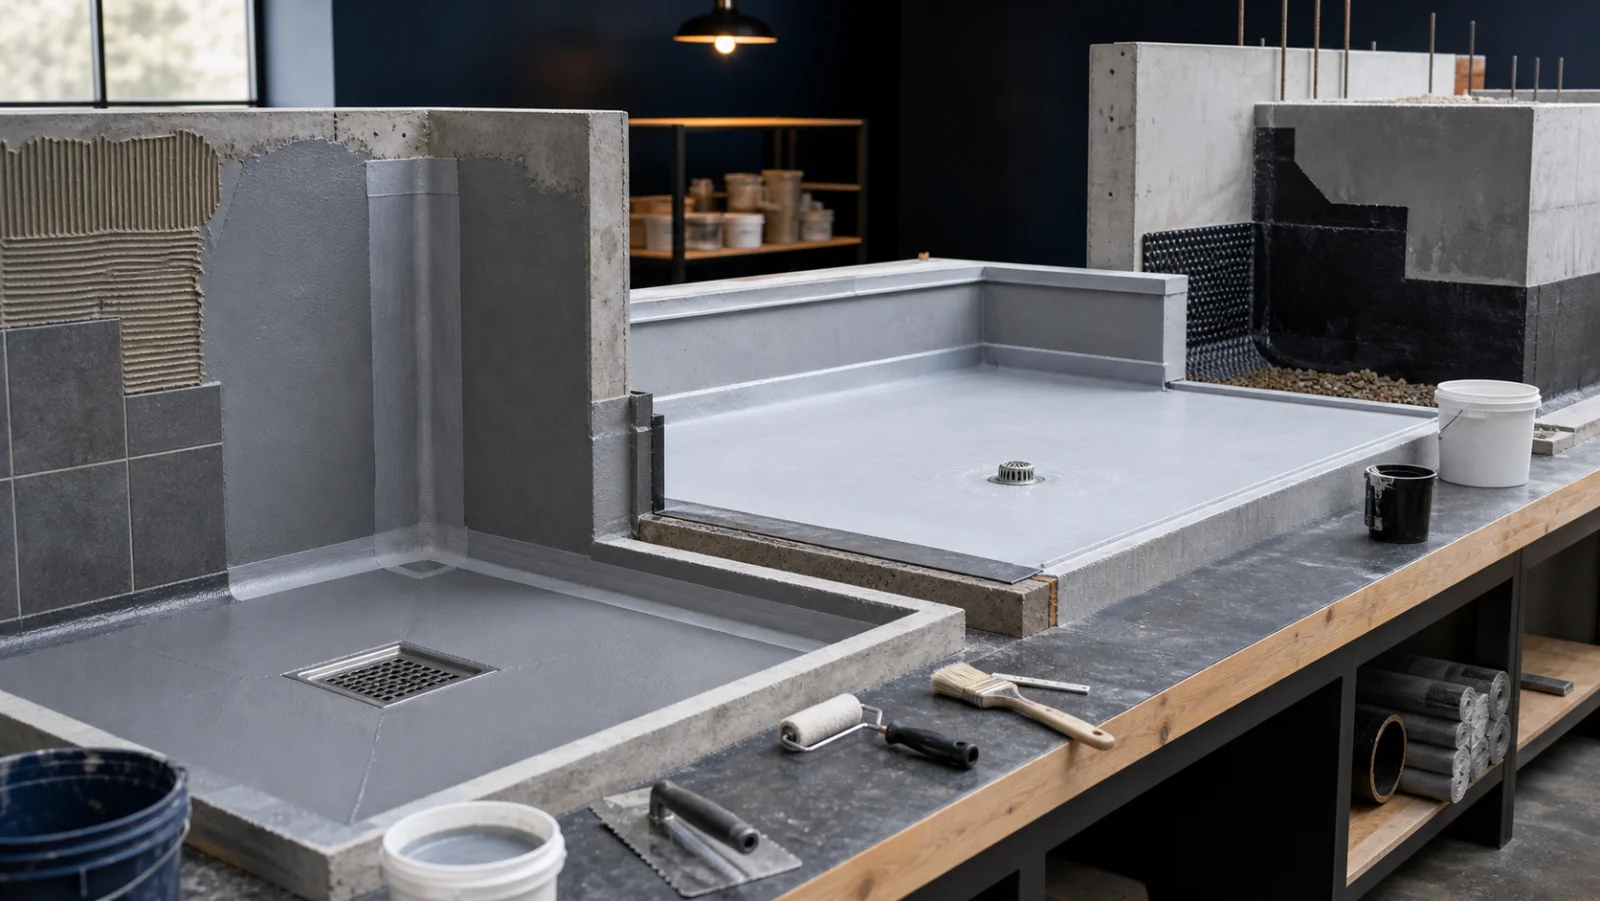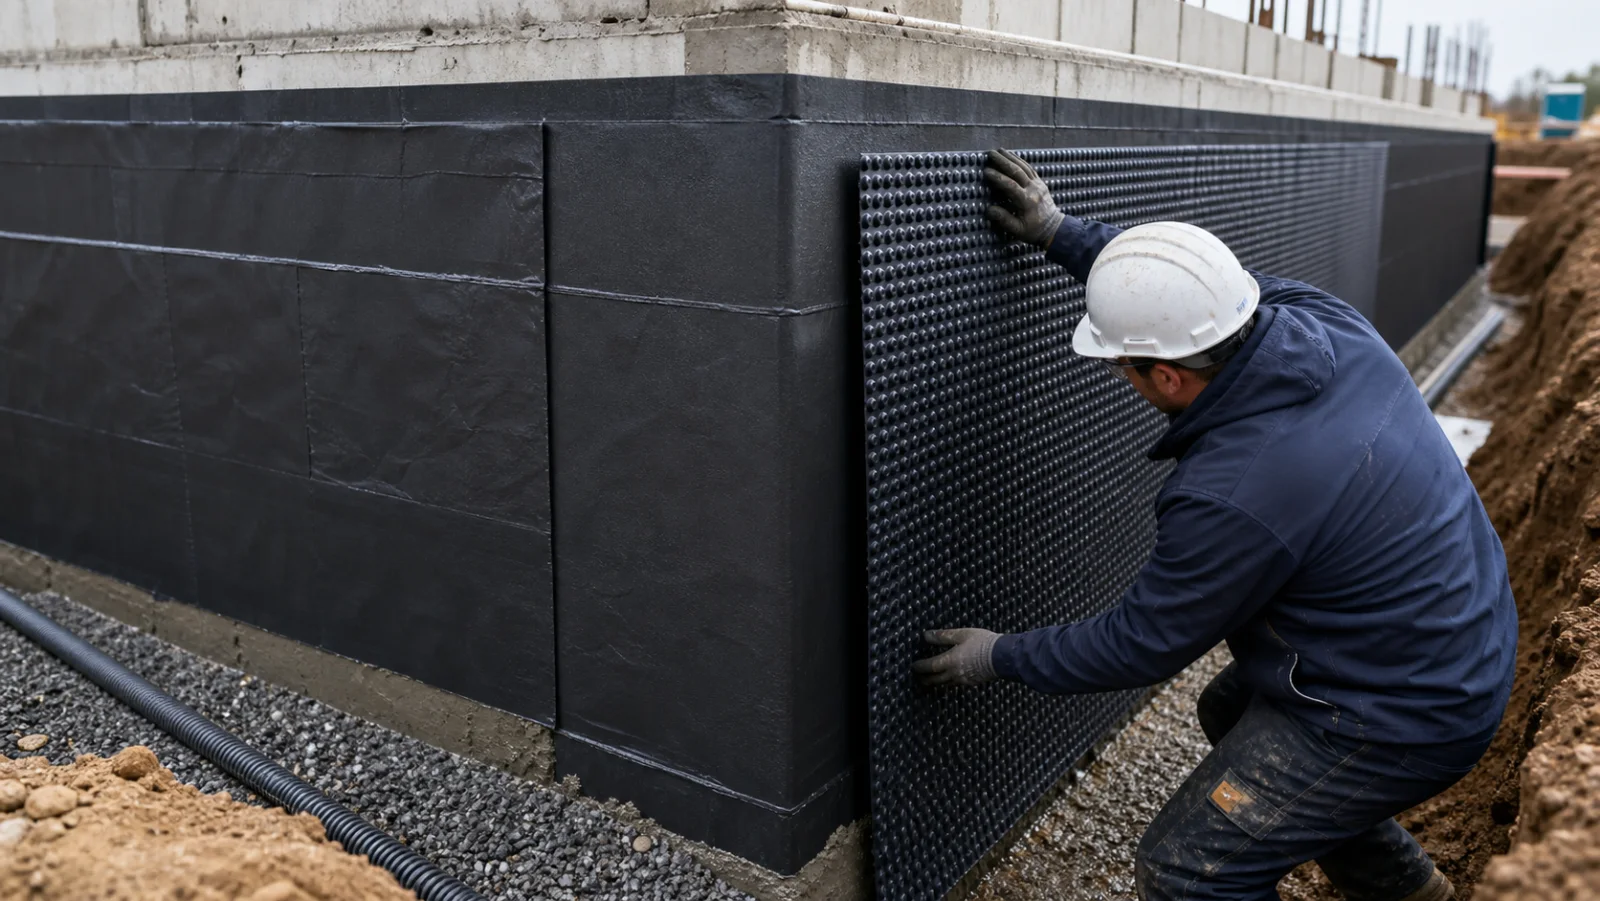
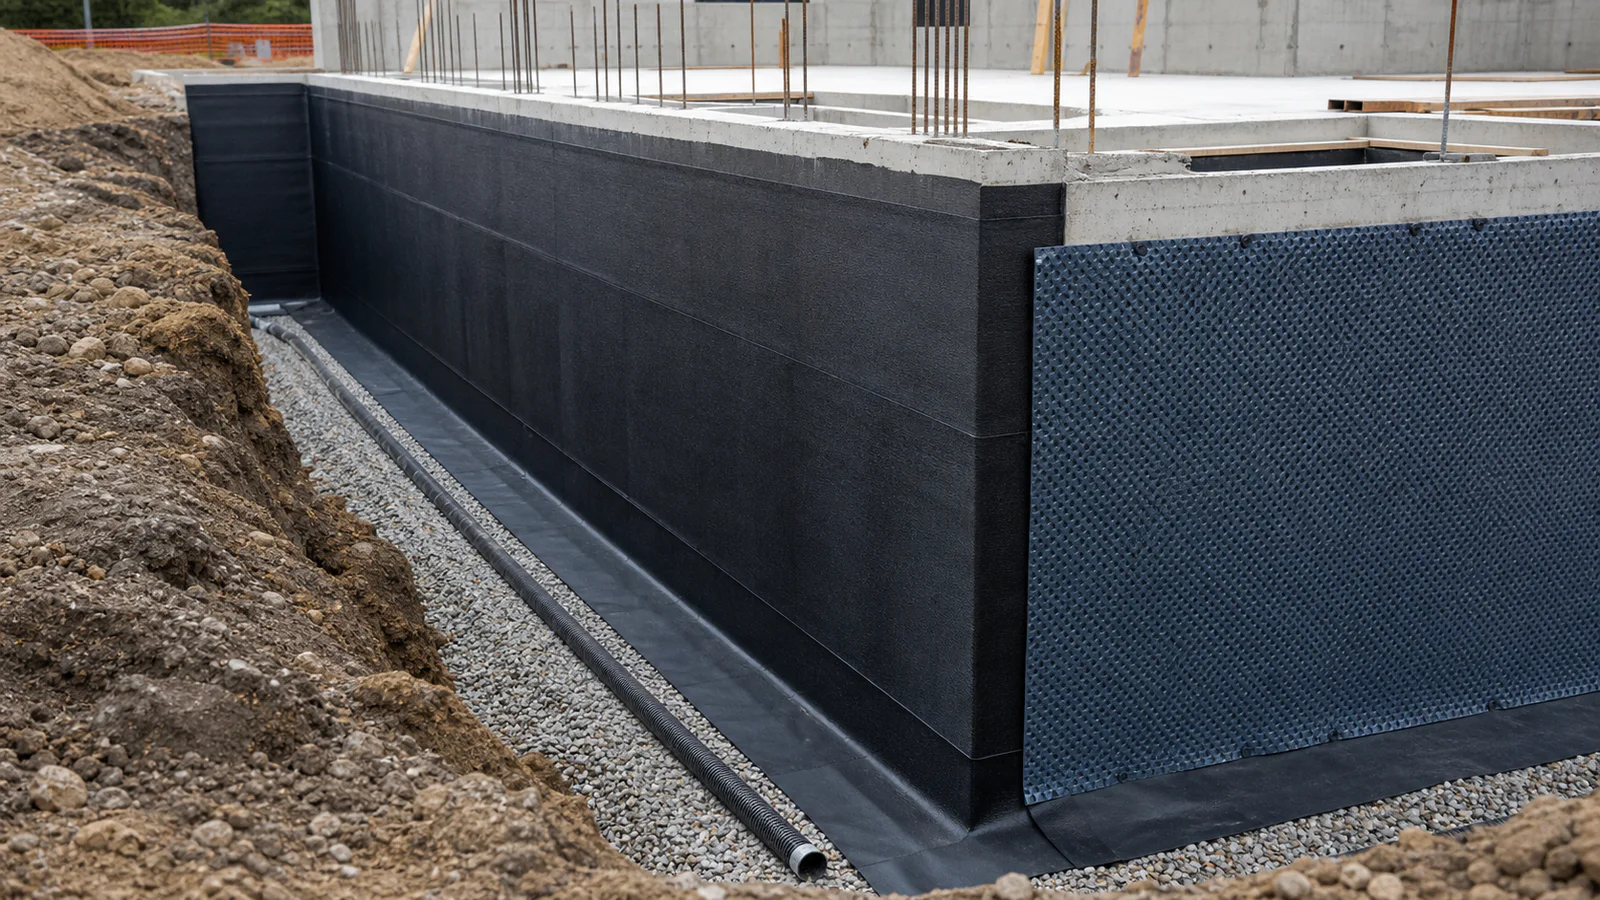
Foundation waterproofing aims to enclose the raft foundation and below-ground retaining walls externally in a continuous waterproofing layer. This method is called “tanking”, because it wraps beneath and around the sides of the structure. In a successful system, the horizontal foundation membrane is securely connected to the vertical wall waterproofing; construction joints, pipe penetrations and protective layers are detailed without leaving weak points.
Drainage does not replace foundation waterproofing. Weber likewise states that drainage around a foundation helps reduce groundwater pressure but does not provide complete waterproofing by itself. Similarly, concrete containing waterproofing admixtures does not automatically remove the need for continuous external waterproofing and joint treatment.
Why Waterproof Foundations from the Outside?
Below-ground reinforced concrete is exposed to ground moisture, seepage and, in some projects, pressurised groundwater. Water can travel through pores and cracks in concrete, leading to reinforcement corrosion, damp basements, damaged finishes and reduced comfort.
Positive-side waterproofing, applied to the outside surface from which water arrives, intercepts water before it enters the structural element. Negative-side waterproofing from inside can be used in some repairs, but should not be viewed as a general substitute for external tanking in a new building.
Foundation Tanking Layers
| Layer | Main role | Critical check |
|---|---|---|
| Even blinding concrete/application surface | Provides a clean, stable substrate for the membrane | No sharp projections, depressions or loose material |
| Primer or separating layer | Provides adhesion or separation for the selected membrane system | Use a product compatible with the manufacturer's system |
| Horizontal waterproofing membrane | Continuously wraps beneath the raft foundation | Laps, seams, corners and pile/pipe details |
| Protective concrete or protection layer | Protects the membrane from reinforcement work and site traffic | Avoid puncturing or dragging insulation during pouring |
| Reinforced concrete raft and walls | Forms the load-bearing structure | Waterstop details at construction and cold joints |
| Vertical wall waterproofing | Wraps the below-ground wall externally | Secure continuity with the horizontal membrane |
| Thermal insulation/protection and drainage board | Protects the membrane from backfill and provides designed thermal and drainage functions | Each layer has a distinct role and compressive strength requirement |
| Drainage pipe and suitable backfill | Discharges accumulated water in a controlled manner | Falls, filter, maintenance/outlet points and safe discharge |
How Is Foundation Waterproofing Installed?
1. Prepare the ground and surface
After excavation safety, ground improvement and drainage measures are completed, prepare even blinding concrete of adequate strength. Remove stones, reinforcement ends, wires, sharp projections and voids that could puncture the membrane. The application surface must meet the selected product's dryness or moisture requirements.
2. Install the horizontal membrane
Apply the bituminous sheet, synthetic membrane or specified liquid/composite system to the manufacturer's detail. Seams and overlaps must not be chosen arbitrarily; staggering, welding or bonding must follow the system specification. Leave enough membrane turn-up to connect to the future vertical wall waterproofing, and protect it throughout construction.
3. Detail piles, pipes and lift pits
Pile heads beneath the foundation, service pipes, lift pits, drainage sumps and changes in level carry higher risks than flat surfaces. Preformed collars, fillets, tapes, fittings and project-specific waterstops must be compatible with the main membrane. Inspect these locations before concrete is poured.
4. Protect the membrane
Avoid heavy traffic directly on the membrane while fixing raft reinforcement. Install protective concrete, boards or the layer specified by the system design. Repair any holes and cuts with the same system before pouring concrete.
5. Waterproof construction and expansion joints
The raft-to-wall junction and cold joints between concrete pours are not simple lines to be covered only with an external liquid product. Depending on the design, PVC/thermoplastic waterstops, swelling tapes, injection hoses or combined systems may be used. Expansion joints require dedicated tapes and profiles suited to their movement capacity.
6. Prepare the wall and apply vertical waterproofing
After formwork removal, repair tie holes, segregation, honeycombing and sharp corners with suitable repair mortar. Form the fillet required by the system at the wall-to-foundation junction. Connect the vertical waterproofing continuously to the horizontal membrane turn-up.
Select bitumen-rubber, bitumen-polyurethane, bituminous membranes or other systems according to groundwater, pressure, substrate, design and manufacturer approval. For sheet systems such as Ravaproof Bituminous Membrane, check reinforcement, thickness and finish options; for liquid systems, check primer, coat count, reinforcement mesh and total dry film thickness.
7. Protect waterproofing and add thermal insulation
Backfill must not contact the waterproofing directly. Use the specified protection boards and, if needed, XPS thermal insulation with compressive strength suitable for below-ground use. XPS does not replace waterproofing; it is a separate layer protecting the membrane and providing thermal performance.
8. Install the drainage system
Lay perforated drainage pipe to suitable falls within filter geotextile and washed drainage aggregate. Connect the outlet to a safe discharge point, inspection chamber or pumping system. A drainage pipe without an outlet can collect water around the foundation. Plan maintenance and cleaning access during design.
9. Backfill under controlled conditions
Once drainage/protection layers are complete, backfill gradually using the specified material. Large, sharp stones must not damage the membrane protection, and compaction equipment must not impose uncontrolled loads on the retaining wall or waterproofing system.
Which Waterproofing Material Should Be Selected?
- Bituminous sheets: Can be used as welded or bonded systems in horizontal and vertical tanking.
- Polymer-modified bitumen liquid products: Adapt to complex vertical details; total thickness and drying require control.
- Bitumen-polyurethane products: Can offer elastic, fast-curing foundation/wall solutions subject to manufacturer approval.
- Synthetic membranes: Welding, detail components and protection methods follow their own systems.
- Crystalline/cement-based products: Can provide supplementary or specialised solutions depending on location and water pressure; they are not direct alternatives to every tanking system.
Compare material families in the waterproofing material selection guide.
Common Foundation Waterproofing Mistakes
- Treating drainage as a substitute for waterproofing
- Leaving horizontal and vertical membranes unconnected
- Sealing construction joints and pipe penetrations later with sealant alone
- Allowing reinforcement work and site traffic on an unprotected membrane
- Applying liquid waterproofing before repairing tie holes and segregation
- Failing to check dry film thickness and consumption
- Leaving drainage pipes without filters, falls or outlets
- Pushing sharp-stone backfill against the wall without a protection layer
Frequently Asked Questions
What is foundation tanking?
It is the method of wrapping beneath the raft foundation and around below-ground walls externally with a connected, continuous membrane system.
Is foundation waterproofing needed if drainage is present?
Yes. Drainage helps reduce water pressure; it does not replace the membrane system. Allow for blockage, heavy rainfall and changes in groundwater.
Is waterproof concrete enough on its own?
Concrete admixtures can reduce water transmission, but do not address cracks, construction joints and penetrations on their own. The project's watertightness approach must be designed as a whole.
Where is XPS installed in foundation insulation?
As designed, it is used outside the vertical wall waterproofing for thermal insulation and membrane protection. Select compressive strength and water absorption classes suitable for below-ground use.
Can internal waterproofing replace external tanking?
Generally not in a new building. Negative-side applications may be used in inaccessible repair areas, but water has not been stopped before entering the structural element.
Conclusion: Reliable foundation waterproofing depends on continuity and disciplined detailing before membrane selection. Horizontal-to-vertical connections, joints, protection, thermal insulation, drainage and backfill must be planned together. Browse waterproofing products and bitumen-based solutions, and obtain technical support from Erk İzolasyon for a system suited to your project.